Bill Cramer Workshop Supply and Recommendation list:
Portable plein air easel – Most modern plein air contraptions use a good camera tripod to hold a palette box and a panel. There are two main types –
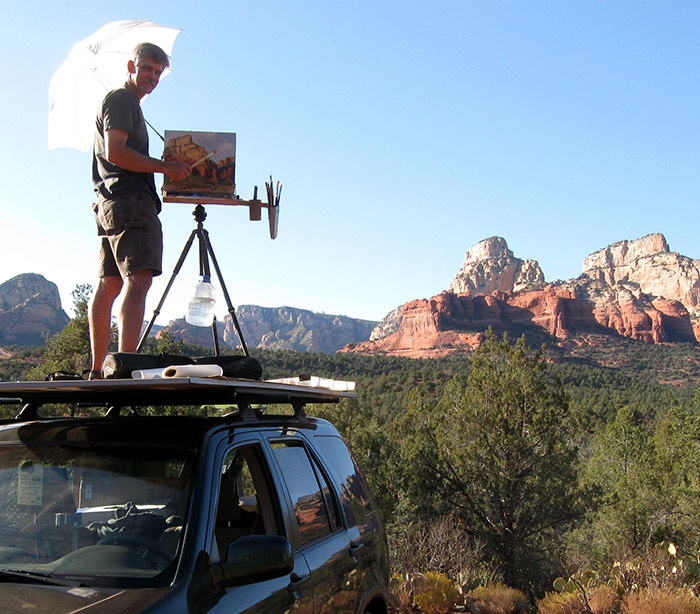
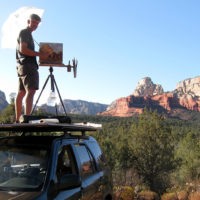
The first type is one where the palette box mounts on two legs of the tripod. The painting panel is attached to a holder that mounts to the tripod head where the camera normally goes. This arrangement is more like painting in your studio because the palette and painting are separated somewhat. Your stance when painting is also more like working in your studio. These can also hold larger panels and canvases. This is the type I typically use for small to medium size paintings. I’ve made my own and can share the details if you want to make one. It’s cheaper and not too hard to do if you’re handy with tools. There are several version out there including ones from Strada, En Plein Air Pro. etc.
The other type of rig uses a thin, laptop-like rectangular box that is mounted on the tripod head. The painting panel is mounted to the hinged lid of the box. Unlike working in your studio, this puts the painting and palette close together. Not a deal breaker, but it might take some getting used to. There are many versions out there including popular ones from Strada, U.Go, or Open M-Box.
A third type is out there and is a bit like the first type described above. It’s usually reserved for painting larger works but can hold almost any size. The available ones are improved versions of the famous Gloucester and Andersen Easels, which were first introduced in the early part of the 20th century. One is the Take-It-Easel and the other is the Beauport easel. These are simple and easy to set up if you plan to go big, but they’re heavy and large to carry around. You’ll need to supply a palette of some kind.
Also, there are other styles where the palette box and wet panel carrier are joined. These can be heavy and limit the sizes of panels you carry. It’s more efficient and gives you more options to have them separate. Also, if your set up uses a tripod, get a good, lightweight one. Get one that does not have the center stabilizing supports like you see on some models (not this). You want to have the option of splaying your tripod legs out to adjust to the terrain better (more like this). You do not have to spend hundreds of dollars. Avoid the old, classic French Easels. They’re heavy, hard to set up, and not always made well. Whatever set up you buy or make, practice setting it up before hitting the road to make sure everything works, and you know how to use it.
Paints – I’ll be using artist grade oil paints. You’ll get better results if you use artist quality paints, not student grade. Utrecht, Lukas 1862 and Gamblin are good brands for the money. I like the feel of these too. Try different paints until you find what you like. There are pricier paints, but I’m not convinced you get that much more out of them for the extra money. I mostly use the Utrecht and Lukas 1862 artist oil colors, all large tubes – heavier to carry along, but I go through a lot of paint. I primarily use Titanium White Cadmium Yellow Light, Cadmium Yellow Lemon, Cadmium Red Light, Alizarin Crimson Ultramarine Blue, Cerulean Blue and/or Cobalt Blue, and Burnt sienna or equivalent transparent earth. This split primary palette has a warm and cool of each primary color and is my usual palette, but feel free to bring whatever you’re most comfortable with using. Any selection of colors will be a compromise; however, a basic palette should have a minimum of 3 to 6 colors that can create a range of mixed hues and dark values all the way down to a near black (I don’t use black, but you can if you want). Sometimes I’ll use quinacridone red, violet, pthalo blue & pthalo green to mix things up or if the situation requires greater variety.
A fun limited palette worth trying is quinacridone magenta (or q. rose), cadmium lemon yellow, cobalt teal (Gamblin) or turquoise (M. Graham), and a white, of course. These are transparent colors from which you can make excellent secondary colors and just about everything else in between.
Brushes, knives & paint movers – Carry an assortment of artist quality flats, brights, filberts and/or rounds. Artist quality brushes will hold more paint, be more responsive and generally last longer. I mainly use hog bristle and a few synthetic brushes. Bristle brushes give a looser look while the synthetics leave a more chiseled/crisper mark. I typically carry several flat bristle brushes sizes 2, 4, 6, 8, & 10, plus a few brights sizes 2, 4, & 6 and maybe a small round or two for finer details. Filberts aren’t a favorite of mine, but many artists use them. Palette knives or other paint movers can be handy for flattening areas, or otherwise moving or removing paint. I carry a medium metal knife and a few rubber paint mover, wipe out tools. Examples include: Catalyst blades and wedges by Princeton, spatchers by Creative Mark, or paint wipe out tools various brands or Kemper Wipe Out Tool.
Odorless paint thinner (OMS) such as Gamsol, Turpenoid, Sunnyside. I use Sunnyside. It’s inexpensive and works well. Cheaper at True Value, etc. Put OMS in leak proof container with brush agitator screen at the bottom. I use an 8 oz. polycarbonate jar with homemade screen in it and a wire bail to hang it. Inexpensive and there’s no gasket in it to fail like some pricey art store ones. I also carry a small jar of extra OMS in case I spill my main jar. Can save the day if you hike far from the car!
Paper towels and trash bag to put used towels in. I carry a nylon backpack stuff sack hooked to my easel. It’s reusable and not as noisy as plastic grocery bags. Plastic shopping bags are noisy and prone to blowing away. A reusable nylon or fabric grocery bag also works well Avoid bright colors, pick one with a mellow, dark color. Hold them on with a simple clamp or hook to easel. One of those handheld retractable razor blade holder thingies is handy for scraping paint off your palette.
Panels (with or without canvas) – Bring smaller panels for quick field studies and a few bigger sizes for longer ones. An assortment of sizes might include 9×12, 10×12; squares are fine, too – 8×8, 10×10, 12×12. I wouldn’t suggest bringing any larger than these. My go to panel right now is an oil primed linen by Centurion. Err on bringing more midsize panels – 9×12 up to 12×16. It’s hard to get much info on smaller panels (5×7, 6×8, 8×10). You want room to move around, put in different elements, and just paint! You can always divide larger panels into smaller proportions in the field. Consider squares or panoramas cut or taped off from larger panels – squares (8×8, 10×10 or 12×12); panoramas (5×10, 6×12 or 10×20); or more extreme (4×12, 5×15 or 6×18). It’s fun to explore a variety of ratios. I’ll be demonstrating a few. Avoid using stretched canvas for plein air. They’re too bulky and prone to damage.
Arrange ways to transport wet panels. There are two types – boxes and frames. Boxes hold several paintings and keeps them separated using spacers. I like ones from Raymar because they’re light and hold a variety of sizes. Boxes made of wood are durable but heavy. Good for transporting paintings in your vehicle or on a river or pack trip where you’re not carrying them. Frames like ones from Panel Pak or Artwork Essentials keeps the wet paintings safe by placing two paintings in a frame facing each other. Carrying frames are easy to make. Let me know if you’d like details on how to make your own. Making your own allows you to create odd sizes that are not generally available. Avoid using stretched canvas – bulky and hard to manage while on the road.
Sketchbook or pad (6×8 or 8×10), soft graphite pencil (9B, 8B, or 6B) and/or a big sharpie pen. Composition value finder gadgets can be handy. These are two of the better ones: Guerrilla Painter Composition Finder and The Tom Lynch Secret Plein Air Tool. You may want to hunt around for the best price. A Small compact mirror to view your painting in reverse. This helps with composition and noticing problems you might not otherwise see.
Misc. – Sun screen, wide brimmed hat, insect repellent, camera to get reference photos, umbrella (can help to keep you cooler and keep the sun off your easel, but not entirely necessary). Wear clothes you will not be worried about getting paint on. This one’s important – dark colored shirts, raincoat, etc. (blue, gray, black) are best so they don’t reflect light onto your panel. A backpack to carry it all! Organize items so they can fit into a single pack. You can attach your easel to this or carry it separately. Any hiking we do for the class will be short; however, it’s best to be able to get to your painting location in a single trip from your car.
If you have any questions, please contact Bill at billcramerpaintings@gmail.com

